
RRB JE 2026 Application Process trips up a surprising number of otherwise well-qualified candidates — not because the eligibility criteria are unclear, but because the online form itself has several specific steps (live photo capture rules, exact signature file size limits, a post-preference ranking system) that aren’t obvious unless you’ve walked through them once already. With the Railway Recruitment Boards now accepting applications for 3,993 Junior Engineer and Depot Material Superintendent posts under CEN No. 04/2026, getting this form right the first time matters — corrections aren’t possible after final submission.
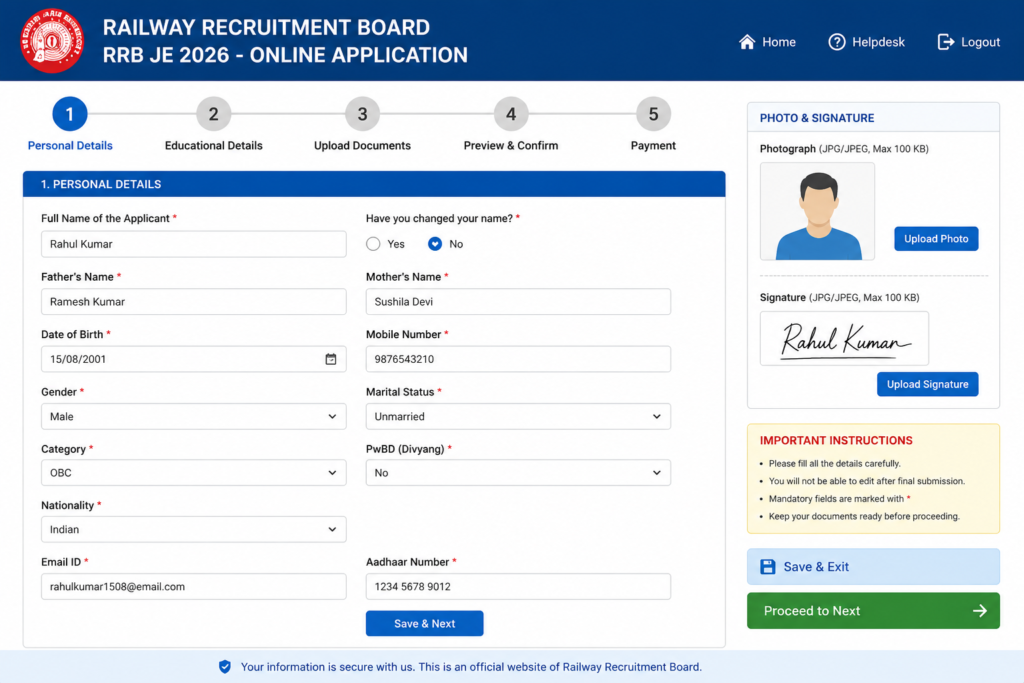
This guide walks through the entire application process from start to finish, in the exact sequence the official portal presents it — account creation, Aadhaar-based verification, personal and category details, educational qualification entry, the live photo and signature upload requirements, post preference ranking, and fee payment. Whether you’re applying for the first time or already have an existing RRB account from a previous recruitment cycle, this covers every screen you’ll encounter along the way.
Table of Contents
Before You Begin: What You’ll Need
Keep the following ready before you start, so you’re not searching for documents mid-application:
- Your SSC (10th class) memo, since several fields — certificate number, roll number, board name, passing year — are taken directly from it
- Your Aadhaar card and the mobile number linked to it
- Diploma or degree certificate details (course name, college, state, district, passing year)
- A valid personal email ID and mobile number for OTP verification
- A non-white colored outfit for your live photo capture (white clothing is explicitly rejected by the system)
- A scanned signature file between 30 KB and 50 KB, in JPG format
Step 1: Visit the Official Portal
Go to the official Railway Recruitment Board application portal at rrbapply.gov.in. This is the single common portal used for all RRB recruitment cycles, so the same website handles JE, Group D, NTPC, Technician, and Paramedical recruitment alike.
Step 2: Check If You Already Have an Account
If you’ve applied for any RRB recruitment before — including Group D, NTPC, Technician, or Paramedical posts in 2024, 2025, or earlier in 2026 — you likely already have an account on this portal. In that case, skip account creation entirely and log in directly using your existing email ID and password.
If this is genuinely your first time applying through this portal, proceed to create a new account.
Step 3: Creating a New Account
Click “Create an Account” and work through the following fields:
- Nationality: Select India
- Full Name: Enter exactly as it appears on your SSC (10th class) memo — this matters, since mismatches with your certificate can cause issues later
- Re-type Full Name: Confirm the same name again
- Have You Changed Your Name: Select “No” unless you have a legal name change on record
- Date of Birth
- Gender
- Father’s Name and Mother’s Name
- Email ID and Mobile Number: Click “Generate OTP” for both — you’ll receive separate OTPs on your email and mobile number, and both must be entered correctly to proceed
Step 4: Aadhaar-Based Verification and Password Setup
After OTP verification, select “Verification through Aadhaar Card” and enter your Aadhaar number to complete identity verification.
Next, create your account password. The system requires:
- At least one capital letter
- Lowercase letters
- At least one special character
- At least one digit
Re-enter the same password to confirm it, complete the “I am not a robot” check, and click “Preview and Create Account.” Your account is now created.
Step 5: Logging In
Return to the login page and choose either:
- Login with Aadhaar — using the mobile number linked to your Aadhaar, or
- Login with RRB Account Credentials — using your registered email ID and password
If you choose Aadhaar login, enter your registered mobile number, click “Generate Aadhaar OTP,” and enter the OTP received to proceed.
Step 6: Reading General Instructions
Once logged in, you’ll land on a dashboard showing General Instructions. Read these carefully before proceeding — the portal explicitly emphasizes that reading the full notification and instructions first, before starting your application, significantly reduces the chance of errors during submission.
This dashboard also shows your Application History, where you can check the status of any previous or current applications, and a Modify Registration Details option if you need to correct any information entered during account creation.
A useful confirmation to look for here: the left side of your screen should display “Account Verified with Aadhaar” once your identity verification has gone through successfully.
Step 7: Selecting the Notification and RRB Zone
From the list of currently open notifications on your dashboard, locate the one for Junior Engineer and Depot Material Superintendent recruitment under CEN No. 04/2026. Select the two checkboxes confirming you’ve read the eligibility and instructions, then proceed to choose your RRB Zone.
This is an important decision: whichever RRB zone you select determines where your first posting will be, if selected. You’re free to apply to any zone regardless of your home state — for instance, candidates from Andhra Pradesh or Telangana aren’t restricted to the Secunderabad zone. After roughly one year of service, transfer requests to other zones become possible based on organizational requirements, but your first posting is tied to your zone selection here.
If your priority is staying close to home, select accordingly. If your priority is simply securing the job with comparatively lower competition, it’s worth checking the previous year’s zone-wise cutoffs before deciding.
Step 8: Filling Personal Details
On this page, most fields carry forward from your account creation, but you’ll need to add:
- Marital Status: Married or unmarried, as applicable currently
- Religion: Select from the available options
- Mother Tongue: Your first language
- Choice of Examination Language: Select your preferred language for the question paper — the exam is conducted in Hindi and English as well as 13 regional Indian languages, including Telugu, so candidates can choose to attempt the exam in their preferred regional language
- Permanent Visible Identification Marks: Details of any birthmarks, referenced from your SSC memo. If you don’t have visible identification marks, simply enter “No Mark” in both identification mark fields
- Present Address and Permanent Address
Once completed, click Save and Next.
Step 9: Category and Reservation Details
This section covers several yes/no declarations:
- Are You an Ex-Serviceman: Select “Yes” or “No” as applicable
- Person with Benchmark Disability (PwBD): Select “Yes” only if applicable; otherwise “No”
- Scribe Details: Leave as “No” unless you require a scribe
- Economically Backward Classes (EBC): Select “Yes” only if you hold a valid EBC certificate; otherwise leave as “No”
- Details of Serving Railway Applicant: Select “No” unless you’re already an Indian Railways employee
- Current Employment Details: If you currently hold a government job, specify Central or State Government accordingly; otherwise select “Not Applicable”
Step 10: Bank Details for Fee Refund
Rather than manually entering full bank account details, you simply provide your Aadhaar card number here. Your linked bank account details are fetched automatically through this. This is the account to which your partial or full application fee refund will be credited after you appear for the examination — SC/ST/Ex-Servicemen/PwBD/Women/Minority candidates get their full ₹250 fee refunded, while other candidates get ₹400 of their ₹500 fee refunded, provided they actually attempt the CBT.
Click Save, then Next.
Step 11: Educational Qualification Details
Start with your 10th class (SSC) details:
- Roll Number and Certificate Serial Number — both found on your SSC memo, typically in the top-left corner; note that the certificate number and roll number are different fields, so don’t confuse the two
- State, District, and Board Name
- Year of Passing
Next, add your higher qualification:
- If you hold a 3-year Diploma, select “Diploma” and specify the relevant discipline
- If you hold a B.E./B.Tech, select “Degree in Engineering” and specify your discipline
Since eligibility for this notification accepts a diploma or degree in virtually any engineering discipline, select the option matching your actual qualification. Enter your course name, state, district, college, and year of passing, then click Add, followed by Next. Note: you must click “Add” before the “Next” button becomes usable — simply filling the fields without adding them first won’t save your entry.
Step 12: Live Photo Capture Rules
This step catches many candidates off guard: RRB does not accept an uploaded passport photo file. Instead, you must click “Capture Live Image” and take your photo directly through the portal at the time of application.
Follow these rules carefully, since a violation can cause the system to reject the capture:
- Wear non-white clothing — white shirts or dresses are specifically not accepted
- Use a dark-colored outfit for good contrast against the background
- Ensure a plain background, ideally outdoors or against an uncluttered wall
- Hold your device at eye level when capturing the photo — not angled from above or below
- Do not wear caps, masks, or spectacles during capture
Step 13: Signature Upload Specifications
Unlike your photo, your signature is uploaded as a file rather than captured live. The requirements are specific:
- File size: minimum 30 KB, maximum 50 KB
- Format: JPG
Click Browse, select your prepared signature file, tick the confirmation checkbox, then click Save and Next.
Step 14: Setting Your Post Preference Order
This is where you rank the specific JE disciplines or the DMS post within your selected RRB zone, in your order of preference. A practical approach: check the zone-wise, post-wise vacancy numbers in the official notification first, and rank the post with the highest vacancy count in your eligible discipline as your first preference, since that generally offers better odds.
Add each preference using the “+” button next to your chosen post — it needs to be added individually for each preference rather than selected all at once. Once your ranking is complete, tick the confirmation checkbox to proceed.
Step 15: Selecting Your Exam Group and Discipline
Next, select your Eligible Exam Group — this is a compulsory field. Based on your selection, the system displays the relevant technical branch options (for example, “Electronics and Allied Engineering”) matching your qualification. Select the branch that matches your actual discipline, then click “I Understand and Agree.”
You’ll then be asked to enter your current place/location — simply enter your present city or town — and click Save.
Step 16: Preview, Confirm, and Final Submission
Click “Preview Application” to review every detail you’ve entered so far, displayed together on one screen. Go through this carefully — check your personal details, category information, educational qualifications, post preferences, and uploaded photo/signature for accuracy.
Once you’re confident everything is correct, tick the final confirmation checkbox and click Submit. The system will explicitly warn you at this point that no corrections are possible after final submission — so don’t click Submit until you’ve genuinely double-checked every field.
Step 17: Paying the Application Fee
After final submission, you’re redirected to the fee payment page, where the amount displayed depends on your selected category:
| Category | Fee | Refund (After Appearing for Exam) |
|---|---|---|
| General/OBC/EWS | ₹500 | ₹400 |
| SC/ST/PwBD/Women/Ex-Servicemen/Minority | ₹250 | Full ₹250 |
Scroll down and select “Pay with SBI ePay,” then complete payment using a debit card, credit card, or net banking. Your application is not considered complete until this fee payment is successfully made — an unpaid application is liable to be rejected, regardless of how completely you filled the earlier sections.
How to Check Your Application Status
To confirm whether your application was submitted and fee payment went through successfully, log back into the portal and check the Application History section on your dashboard. It will show whether your application status is “Submitted” or still “Pending.”
Common Mistakes to Avoid
- Creating a duplicate account. If you’ve applied for any RRB recruitment before, check for an existing account first — a second account can create complications rather than help.
- Wearing white clothing during live photo capture. The system explicitly rejects this — wear a dark, non-white outfit against a plain background.
- Uploading a signature file outside the 30–50 KB range, or in the wrong format. Stick precisely to JPG format within these size limits.
- Confusing your SSC certificate number with your roll number. These are two distinct fields on your memo — double-check before entering.
- Clicking “Next” without clicking “Add” first on the education details page. Your qualification entry won’t save unless you explicitly add it before moving forward.
- Submitting the application without paying the fee. An application isn’t complete until fee payment is successful — don’t assume submission alone is sufficient.
- Setting post preferences randomly rather than by vacancy count. Check the zone-wise vacancy breakdown in the notification and rank posts with higher vacancy counts higher in your preference list for better odds.
- Rushing through final submission without reviewing the preview page. Corrections are not possible after final submission — review every field carefully first.
Expert Tips for a Smooth Application
- Complete the entire application process on a device with a stable internet connection — losing connectivity mid-form, especially during live photo capture or Aadhaar OTP verification, can force you to restart certain steps.
- Keep your SSC memo, Aadhaar card, and educational certificates physically next to you while filling the form, rather than switching between apps or tabs to locate them.
- If you’re applying via mobile, turning your device to landscape mode can make the form considerably easier to navigate, as several fields render more clearly in this orientation.
- Select your exam language deliberately — if Telugu is your stronger language for a technical exam, choosing it at this stage (rather than defaulting to English) can genuinely help your performance under time pressure.
- Research the previous year’s zone-wise and post-wise cutoffs before finalizing your RRB zone and post preference order, rather than choosing based on convenience alone.
- Take a screenshot or save a PDF of your submitted application and payment confirmation for your personal records, in addition to whatever confirmation the portal provides.
Frequently Asked Questions (FAQ)
1. What is the RRB JE 2026 Application Process?
It is the step-by-step online procedure for applying to Junior Engineer and Depot Material Superintendent posts under CEN No. 04/2026, conducted entirely through the rrbapply.gov.in portal, from account creation through fee payment.
2. Do I need to create a new account if I’ve applied for RRB Group D or NTPC before? No. If you already have an account on rrbapply.gov.in from any previous RRB recruitment cycle, you can log in directly using your existing credentials.
3. Can I upload a photo file instead of capturing a live photo?
No. The portal requires a live photo captured directly through the application system — pre-saved or uploaded photo files aren’t accepted for this step.
4. What are the signature upload requirements?
A JPG file between 30 KB and 50 KB in size.
5. Does my RRB zone selection affect my job posting?
Yes. Your first posting, if selected, will be within the RRB zone you choose during application. Inter-zone transfers become possible after approximately one year of service, based on requirement.
6. Can I apply for a zone outside my home state?
Yes. Candidates from any state can apply to any RRB zone nationwide — there’s no residency restriction tied to zone selection.
7. What is the application fee, and is it refundable?
₹500 for General/OBC/EWS candidates (₹400 refunded after appearing for the exam) and ₹250 for SC/ST/PwBD/Women/Ex-Servicemen/Minority candidates (fully refunded after appearing for the exam).
8. Can I edit my application after final submission?
No. The portal explicitly states that corrections are not possible after final submission — review the preview page carefully before submitting.
9. Is the exam available in Telugu?
Yes. Along with Hindi and English, the exam is conducted in 13 regional Indian languages, including Telugu, selectable during the application process.
10. How do I check if my application was successfully submitted?
Log in to the portal and check the Application History section on your dashboard, which shows your current application status.
Conclusion
The RRB JE 2026 Application Process is straightforward once you know exactly what each screen expects — but a handful of specific requirements (the live-only photo capture, exact signature file size, and the one-time-only final submission) genuinely trip up candidates who rush through it. Gather your documents beforehand, follow each step in sequence, review your preview page thoroughly, and complete your fee payment to ensure your application is genuinely counted. With the window open until 13 September 2026, there’s no reason to leave this until the final days.
For more detailed application walkthroughs and verified recruitment updates, check out our Latest Railway Jobs category page for regularly updated, source-checked guides. And if you haven’t yet reviewed the full eligibility, salary, and exam pattern details for this recruitment, our detailed guide on RRB JE Recruitment 2026 covers everything you need before you begin the application.
Suggested Internal Links
- Latest Railway Jobs Category
- RRB JE Recruitment 2026: 3,993 Posts, Apply
- RRB Group D Preparation Strategy 2026: Best Guide
- RCF Apprentice Recruitment 2026: 734 Posts, No Exam
Suggested External References (for fact-checking and updates)
- Official RRB Application Portal: https://www.rrbapply.gov.in
- RRB Secunderabad Official Website: https://www.rrbsecunderabad.gov.in